

How to Repair a Leaking Flush Valve Spindle: A Complete Guide
Table of Contents
A leaking flush valve spindle can be a common issue in toilets, leading to wasted water and increased utility bills. Fortunately, repairing this problem is a straightforward process that you can tackle on your own. In this guide, we will walk you through the steps to repair a leaking flush valve spindle, ensuring your toilet operates efficiently and effectively.
Understanding the Flush Valve Spindle
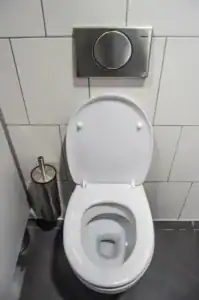
The flush valve spindle is a crucial component of your toilet’s flushing mechanism. It connects the flush handle to the valve itself, allowing water to flow from the flush body into the bowl when you flush. Over time, wear and tear can cause the spindle to leak, resulting in continuous water flow or drips. Identifying and repairing this issue early can save you from more extensive problems down the road.
Tools and Materials You’ll Need
Before you begin the repair, gather the following tools and materials:
- Adjustable wrench
- Screwdriver (flathead and Phillips)
- Replacement parts (spindle, washers, or seals)
- Plumber’s tape
- Bucket or towel (to catch any water)
Step-by-Step Repair Process
Turn Off the Water Supply
Start by locating the shut-off valve for the water supply line, usually found behind the toilet. Turn it clockwise to stop the water flow, preventing any further leaks during your repair.
Drain the water
Flush the toilet to empty the water completely. Use a towel or bucket to catch any residual water that may remain.
Inspect the Flush Valve Spindle
Remove the toilet tank lid and inspect the flush valve spindle for visible signs of damage or wear. Look for cracks, corrosion, or worn-out washers that could be causing the leak.
Disassemble the Flush Valve Spindle
Using a screwdriver, carefully remove any screws or fasteners holding the spindle in place. If necessary, use an adjustable wrench to loosen any connections.
Replace Damaged Parts
If you identify any damaged components, such as the spindle itself or washers, replace them with new ones from our catalogue. Ensure that you select the correct parts that fit your specific flush valve model.
Reassemble the Spindle
Once the new parts are in place, reassemble the flush valve spindle. Tighten all screws and connections securely, but avoid over-tightening, which can cause additional damage.
Turn On the Water Supply
Open the shut-off valve to restore water flow to the tank. Allow the tank to fill, and check for any leaks around the spindle and flush valve.
Test the Flush
After the tank is filled, test the flush by rotating the flush handle. Ensure everything is functioning correctly and that there are no leaks. If you notice any issues, double-check your assembly and connections.
Why Choose Our Products?
When repairing your flush valve spindle, using high-quality replacement parts is essential for a long-lasting solution. Our catalogue offers a wide range of flush valve components designed for durability and efficiency. By choosing our products, you are investing in reliable plumbing solutions that enhance the performance of your bathroom fixtures.
Conclusion
Repairing a leaking flush valve spindle is a manageable task that can save you money and improve your bathroom’s efficiency. With the right tools and guidance, you can complete this repair with confidence. If you need replacement parts or further assistance, explore our extensive catalogue for all your plumbing needs.


Add comment
You must be logged in to post a comment.